I sat down to register a Stripe webhook endpoint, needed a public HTTPS URL pointing at my laptop, and did what every dev does on autopilot: reached for ngrok. Then I stopped and actually read what the free plan gives you these days, because the picture in my head was out of date.
The old complaint is dead. The URL that changes on every restart? Every ngrok account gets a free permanent dev domain that stays assigned even when it sits idle. The real limits are quotas. The free plan stops at 1 GB of transfer, 20,000 HTTP requests a month and 3 online endpoints, and you can’t bring a custom domain. And the browser interstitial page everyone grumbles about? It doesn’t touch webhook senders.
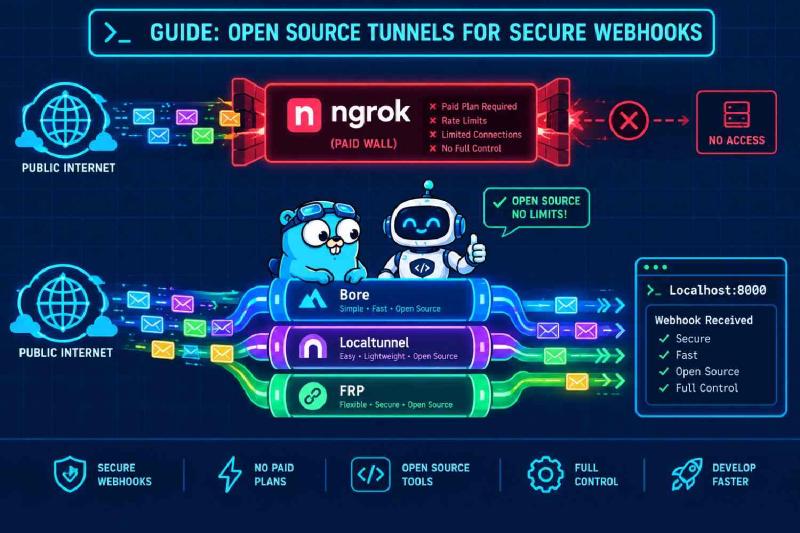
So ngrok free is fine for light webhook testing. The reasons to look elsewhere got narrower: you want your own domain without paying, you want no quota, or you don’t want a third party sitting in the path. Here are the tools worth your time, and the problem each one comes with. Every one of them has a problem.
| Tool | Who runs the relay | HTTPS out of the box | Stable URL | Main catch |
|---|---|---|---|---|
| cloudflared quick tunnel | Cloudflare | Yes | No, new URL every run | Testing only, 200 request cap, no SSE |
| cloudflared named tunnel | Cloudflare | Yes | Yes | Needs an account and a domain on Cloudflare DNS |
| zrok | zrok.io hosted, or you | Yes | Only with reserved names | Account token required, v2 renamed the binary |
| bore | Your VPS | No, plain TCP | Yes, if you pin the port | No TLS, no request inspection |
| frp | Your VPS | Only if you configure it | Yes | Two config files and a server to maintain |
cloudflared #
The mechanism is simple, and it’s why this works behind any router. cloudflared opens outbound connections to Cloudflare, so you open no inbound ports and nothing on your network needs NAT tricks. When Stripe or GitHub posts to your public hostname, Cloudflare catches it and pushes it down the connection you already opened. That’s why it works on a laptop on hotel wifi.
brew install cloudflared
cloudflared tunnel --url http://localhost:3000
That prints a trycloudflare.com address and needs no account. Now the catches. Quick tunnels get a new URL every time you restart cloudflared, they’re capped at 200 concurrent in-flight requests, and they don’t support Server-Sent Events. The changing URL is exactly the old ngrok complaint, so a quick tunnel is no fix for it. For webhooks it means re-pasting the endpoint into the provider’s dashboard after every restart. Fun afternoon.
If you want the URL to stay put, you need a named tunnel. The persistent setup needs a Cloudflare account, a domain using Cloudflare DNS, and a tunnel token generated in the dashboard. Still free, but you have to own a domain. The cloudflared client is open source. The relay on the other end is Cloudflare’s service — worth knowing if “open source” means the whole path to you.
zrok #
zrok sits on OpenZiti, an overlay network. Instead of exposing a port to the world, your machine and the share both hold identities, and traffic travels over that overlay. You can share publicly, which gives you a URL like ngrok does, or privately, where only holders of a share token can reach it. For webhooks you want public.
Setup trips people up at the first command. You register for an account first, and the activation page then shows an enable command containing your unique token. Running zrok enable bare does nothing useful. There’s also a version change. In zrok v2 the binary is called zrok2 and its environment directory is ~/.zrok2, so it can sit alongside a v1 install. That release landed in March 2026, so most older tutorials still show the v1 zrok command and will send you in circles.
zrok2 enable <your_account_token>
zrok2 share public localhost:3000
A public share gets a random URL by default, which means the same restart problem as a quick tunnel. v2 removed the old reserve commands and replaced them with a system of namespaces and names, so a stable hostname goes through that now. Check the current docs for the exact flags before you script anything. The reason to pick zrok is access control and self-hosting, not URL stability.
bore #
bore is a tiny Rust program. The server runs on a VPS, the client on your laptop, and the client opens a control connection and gets a port on the VPS. Anything arriving at that port gets copied down to your local port as raw bytes.
That last detail is the whole problem. bore forwards TCP and knows nothing about HTTP or TLS. Your webhook shows up at http://your-vps-ip:PORT in plain text, and Stripe requires endpoint URLs to be HTTPS, in test mode as well as live. So bore alone won’t satisfy a lot of webhook providers. You can bolt a TLS-terminating proxy like Caddy in front of it, but now you’re maintaining two moving parts to get what frp does in one.
If you use it anyway, two flags matter. Skip the secret and anyone who finds your server can use your VPS as a free relay. Skip the pinned port and you get a different one every run.
# on the VPS
bore server --secret some-long-random-string

# on the laptop
bore local 3000 --to your-vps-ip --port 8080 --secret some-long-random-string
The pinned port is what gives you a permanent address. The VPS firewall also needs the control port and your chosen port open, or nothing connects and you’ll blame the wrong thing for twenty minutes.
frp #
frp is the heavyweight. frps runs on the VPS and frpc on your laptop, and the server routes incoming HTTP requests by hostname to whichever client registered that domain. That’s what makes it the right fit when a provider needs a fixed domain and a real certificate.
Old guides still show INI-style [common] sections. Don’t copy them. Config files are TOML now, and INI has been deprecated since v0.52. You also need both halves, because the client can’t connect to a server that isn’t configured.
# frps.toml (on the VPS)
bindPort = 7000
vhostHTTPPort = 8080
auth.token = "a-long-random-secret"
# frpc.toml (on your laptop)
serverAddr = "192.0.2.1"
serverPort = 7000
auth.token = "a-long-random-secret"
[[proxies]]
name = "webhook_local"
type = "http"
localPort = 3000
customDomains = ["webhook.example.com"]Run frps -c frps.toml on the server and frpc -c frpc.toml on the laptop. Two details trip people up. The token has to match on both sides or the login fails, and an HTTP proxy returns 404 if the request reaches the server on the wrong port or the domain doesn’t resolve to it. With vhostHTTPPort = 8080, your URL is http://webhook.example.com:8080 unless you set it to 80.
For HTTPS, switch the proxy type and let frp terminate TLS with your certificate. The https2http plugin takes a certificate and key and forwards plain HTTP to your local service. The server then also needs vhostHTTPSPort = 443.
[[proxies]]
name = "webhook_https"
type = "https"
customDomains = ["webhook.example.com"]

[proxies.plugin]
type = "https2http"
localAddr = "127.0.0.1:3000"
crtPath = "./server.crt"
keyPath = "./server.key"
hostHeaderRewrite = "127.0.0.1"
What I’d actually run #
If you own a domain, a named Cloudflare tunnel gives you a stable HTTPS URL with no server to babysit. If you want a throwaway URL for one afternoon, a quick tunnel does it in one command. If you’d rather own the relay, frp on a cheap VPS is the one that handles TLS and custom domains properly. bore belongs with TCP services like databases and SSH, not with webhook providers that insist on HTTPS.
Whatever you pick, remember what a tunnel is: a public door into your laptop. Anyone who knows the URL can send requests to your machine while the tunnel is open. Verify the provider’s signature on every payload, and close the tunnel when you’re done. Nobody needs a door left open because you forgot to Ctrl-C.